Citat:
Da li bi mogla neka skripta da se napravi?
I kako je ubaciti? I gde?
Slično se traži na
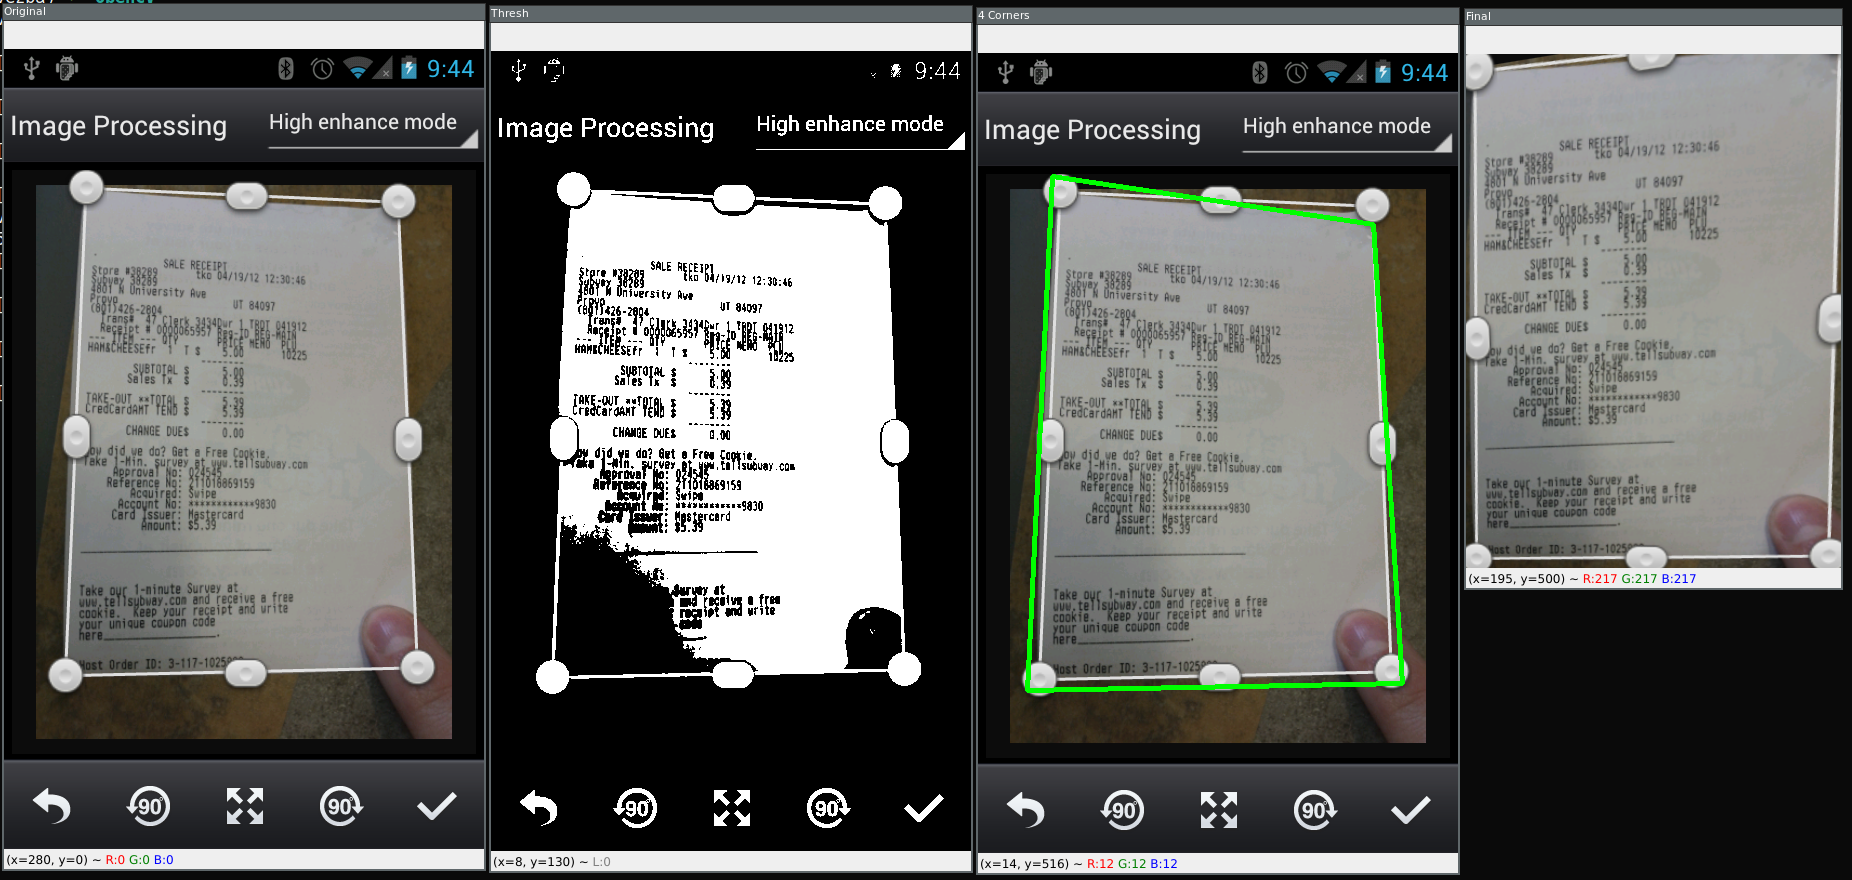
onom linku slike koji si postavio u prvoj poruci, a ne Windows aplikacija koja u slici traži konture određenog oblika i seče sliku do istih. Kao što je navedeno na pomenutom linku, to možeš da odradiš pomoću OpenCV API-ja koji je dostupan za C++, Java i Python programske jezike.
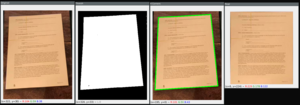
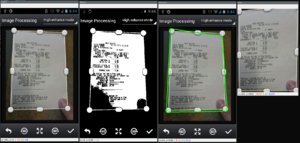
Ja sam se pomalo igrao sa pomenutom bibliotekom u Python-u i dobio ne tako loše rezultate.


Code (python):import pathlib
import sys
import cv2 as cv
import numpy as np
def read_image(image):
img = cv.imread(image)
# if img.shape[1] > 1000:
# img = cv.resize(img, (img.shape[1]//2, img.shape[0]//2),
# interpolation=cv.INTER_CUBIC)
return img
def get_corners(image):
gray = cv.cvtColor(image, cv.COLOR_BGR2GRAY)
# blur = cv.GaussianBlur(gray, (5,5), cv.BORDER_DEFAULT)
# canny = cv.Canny(blur, 125, 175)
# cv.imshow('Canny', canny)
_, thresh = cv.threshold(gray, 125, 255, cv.THRESH_BINARY)
# cv.imshow('Thresh', thresh)
# https://docs.opencv.org/4.x/dd...orial_py_contour_features.html
contours, _ = cv.findContours(thresh, cv.RETR_LIST,
cv.CHAIN_APPROX_SIMPLE) # cv.CHAIN_APPROX_NONE
contours = sorted(contours, key=cv.contourArea, reverse=True)
for contour in contours:
# approximate the contour
perimeter = 0.05 * cv.arcLength(contour, True)
corners = cv.approxPolyDP(contour, perimeter, True)
# if contour with 4 points founded, break the loop
if len(corners) == 4:
break
return corners
# Copy/Paste from
# https://pyimagesearch.com/2014...perspective-transform-example/
# or install: https://pypi.org/project/imutils/
def order_points(pts):
# initialzie a list of coordinates that will be ordered
# such that the first entry in the list is the top-left,
# the second entry is the top-right, the third is the
# bottom-right, and the fourth is the bottom-left
rect = np.zeros((4, 2), dtype = "float32")
# the top-left point will have the smallest sum, whereas
# the bottom-right point will have the largest sum
s = pts.sum(axis = 1)
rect[0] = pts[np.argmin(s)]
rect[2] = pts[np.argmax(s)]
# now, compute the difference between the points, the
# top-right point will have the smallest difference,
# whereas the bottom-left will have the largest difference
diff = np.diff(pts, axis = 1)
rect[1] = pts[np.argmin(diff)]
rect[3] = pts[np.argmax(diff)]
# return the ordered coordinates
return rect
def four_point_transform(image, pts):
# obtain a consistent order of the points and unpack them
# individually
rect = order_points(pts)
(tl, tr, br, bl) = rect
# compute the width of the new image, which will be the
# maximum distance between bottom-right and bottom-left
# x-coordiates or the top-right and top-left x-coordinates
widthA = np.sqrt(((br[0] - bl[0]) ** 2) + ((br[1] - bl[1]) ** 2))
widthB = np.sqrt(((tr[0] - tl[0]) ** 2) + ((tr[1] - tl[1]) ** 2))
maxWidth = max(int(widthA), int(widthB))
# compute the height of the new image, which will be the
# maximum distance between the top-right and bottom-right
# y-coordinates or the top-left and bottom-left y-coordinates
heightA = np.sqrt(((tr[0] - br[0]) ** 2) + ((tr[1] - br[1]) ** 2))
heightB = np.sqrt(((tl[0] - bl[0]) ** 2) + ((tl[1] - bl[1]) ** 2))
maxHeight = max(int(heightA), int(heightB))
# now that we have the dimensions of the new image, construct
# the set of destination points to obtain a "birds eye view",
# (i.e. top-down view) of the image, again specifying points
# in the top-left, top-right, bottom-right, and bottom-left
# order
dst = np.array([
[0, 0],
[maxWidth - 1, 0],
[maxWidth - 1, maxHeight - 1],
[0, maxHeight - 1]], dtype = "float32")
# compute the perspective transform matrix and then apply it
M = cv.getPerspectiveTransform(rect, dst)
warped = cv.warpPerspective(image, M, (maxWidth, maxHeight))
# return the warped image
return warped
if __name__ == '__main__':
if len(sys.argv) > 1:
img_path = pathlib.Path(sys.argv[1])
else:
img_path = pathlib.Path(__file__).parent
output_dir = f'{img_path.as_posix()}/output'
pathlib.Path(output_dir).mkdir(exist_ok=True)
for img in img_path.iterdir():
if img.suffix.lower() in ('.png', '.jpg', '.jpeg'):
image = read_image(img.as_posix())
corners = get_corners(image)
new_image = four_point_transform(image, corners.reshape(4, 2))
image_name = f'{img.name.removesuffix(img.suffix)}_cropped{img.suffix}'
cv.imwrite(f'{output_dir}/{image_name}', new_image)
Za pokretanje Python skripta je potrbno
preuzeti i instalirati Python, zatim
instalirati opencv-python paket. Python script pokrenuti sa
python ime_skripta.py ako se slike nalaze u istom direktorijumu kao i sam skript ili sa
python ime_skripta.py "/putanja/do/direktorijuma/sa/slikama".

 Crop image aplikacija


 A svakako svaki editor slika ima opciju da tranformiše crop u pravoguaonik. Photoshop ima.
 Re: Crop image aplikacija